How to set-up a "Size Pack" to get multiple sizes of your portraits
- Try it on AI

- Aug 30, 2025
- 2 min read
Updated: Sep 1, 2025
To use this feature, you must have a Teams project setup. So go ahead and login to your Teams studio and follow the steps below to create a "Size Pack" which will allow you to download a zip file that includes multiple sizes of the same portrait. Step 1: Go to Team Projects Click on "View project".

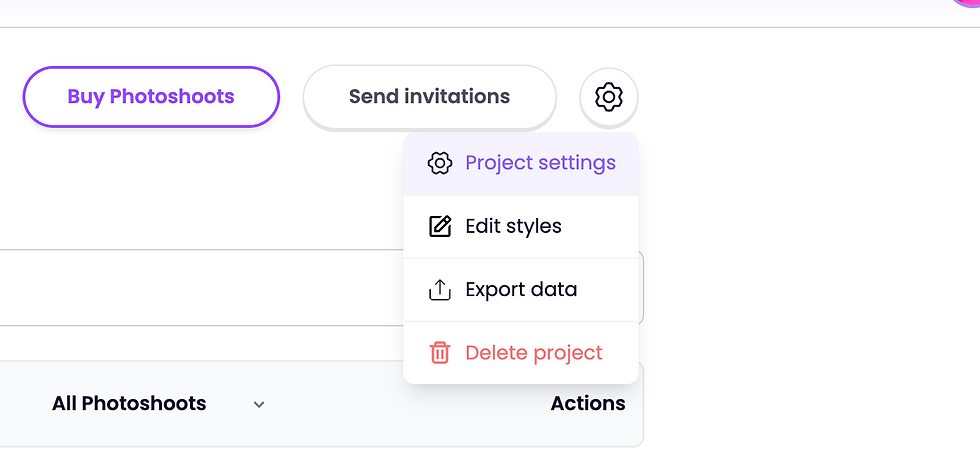
Step 2: Click on Settings Wheel Once inside your project click on the Settings wheel icon at the top right.

And then proceed to "Project settings"
Step 3: Set up your size pack Click on Download sizes and start setting up the sizes you'd like in your "size pack". You can set-up as many as you like, but of course the more you have the slower the download zip fil will be to get. The max size you can setup is 2048 x 2048.

Step 3: Close the pop-up Once you've added all the sizes you need, you can close this window. You can always come back and change it. Important note - the portrait style guides the aspect ratio of the downloaded images. This means that "Download sizes" will not crop the portrait or expand it. For example, if your portrait style aspect ratio is 1200 x 960, but in the Download sizes you specify 1000 x 1000, the download size will be 1000x800.

Step 4: Click Download
Now you're ready to go and download the size pack. Simply click Download and then click on Size Pack.

Step 5: Check Browser downloads
The folder will download to your browser files. If you don't see it, you might need to check your browser settings and ensure you allow zip file downloads. The zip file will look like this and start with "download_kit_...".

All your image sizes will be inside, just like this:

That's it! This does not require any credits to setup, just a tiny bit of your time. We hope this tool saves you lots of resizing time.